FRIGATE is one of the very few companies providing services for Joining of Steel Cord Belt for Bucket Elevators. Our qualified engineers have done the joining of more than 150 belts for almost all major cement manufacturers.
Installation Procedure of Elevator Belt
The belt is generally delivered cut to the required length and provided with the necessary holes for bucket bolts and clamping bolts (one side only).
The belt must be checked for accuracy of measurements and with the belt drawing.
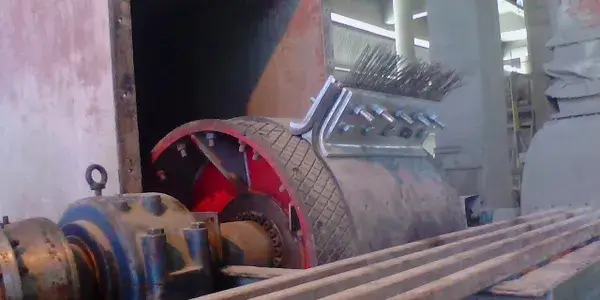
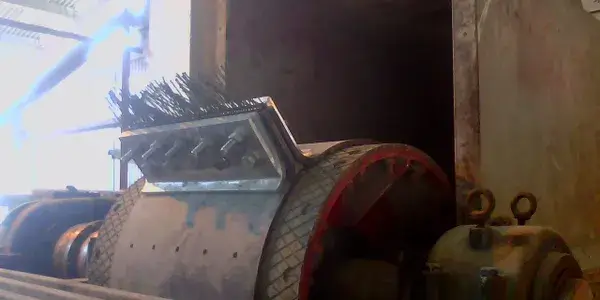
Place the take-up into its top position and lock the same. The belt shall be pulled inside the elevator through the erection opening or the opening in the boot casing. When the belt has been erected, it should be placed centrally on the drive pulley.
The belt shall be tightened by means of the erection and clamping arrangement. The actual location of second set of belt clamping device is to be marked as per site condition as indicated in the belt drawing.
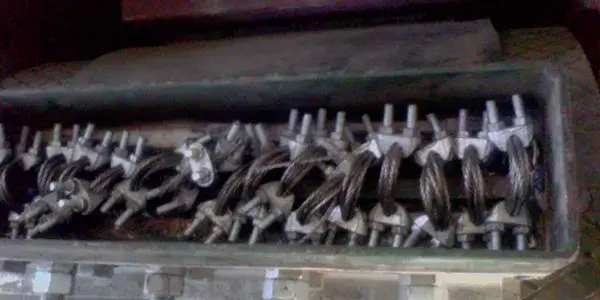
The bolts of the clamping arrangement shall be fit in alternatively, i.e. the bolt head will alternatively be upside and downside.
Tighten the bolts (10.9 Grade) with a tension wrench, as per following table
The belt must be pre-tightened in accordance with the specifications of the equipment drawing.
The side travel switches must be set so that the switch responds when the belt edge over shoots the pulley face at the head pulley and 25 mm beyond the pulley face in the bottom drum.
Before fixing of the buckets, the belt should be tested giving special attention to the centric running of the belt.
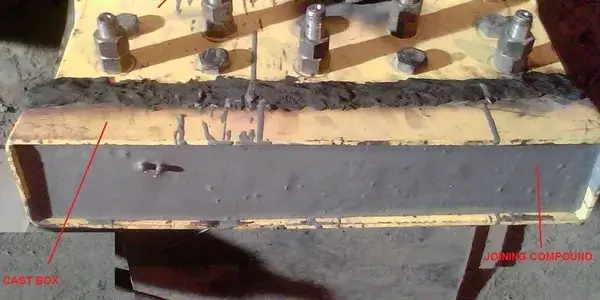
After curing of PLASTIC METAL COMPOUND cast mass (approx. 16 hours at 20-deg.C. ambient temperature and 8 hours at 30-deg.C.) the tension mounting tool must be removed and the clamping device connection bolts have to be loosened that far, that with the belt and tension pulley weight and cast box is equally and strongly pressed before the clamping device.
Afterwards the clamping device bolts/nuts of 10.9/10 grade have to be firmly tightened with the torque wrench, in 3 steps starting from mid of belt to the outside, each time in alternating sequence.
After the 3rdstep the counter lock nuts have to be mounted and tightened with 100 Nm.
The PLASTIC METAL COMPOUND cast mass will be fully cured after 24 hours at 20-deg.C. Ambient temperature or after 12 hours at 30-deg.C.
Only after attaining the full curing of PLASTIC METAL COMPOUND the cast mass the belt can be run and then bucket fixed.
After fixing the buckets and before taking no load trial the torque values to the belt clamping device bolts etc. Sl no. 12, Step-3 has to be controlled and if necessary, the bolts have to be tightened again.
Belt Clamping Device
Measuring and marking of hole-distances should be done starting from the middle of the belt.
© 2025 Frigate Teknologies Pvt. Ltd.